Create tables easily in Figma.
Overview
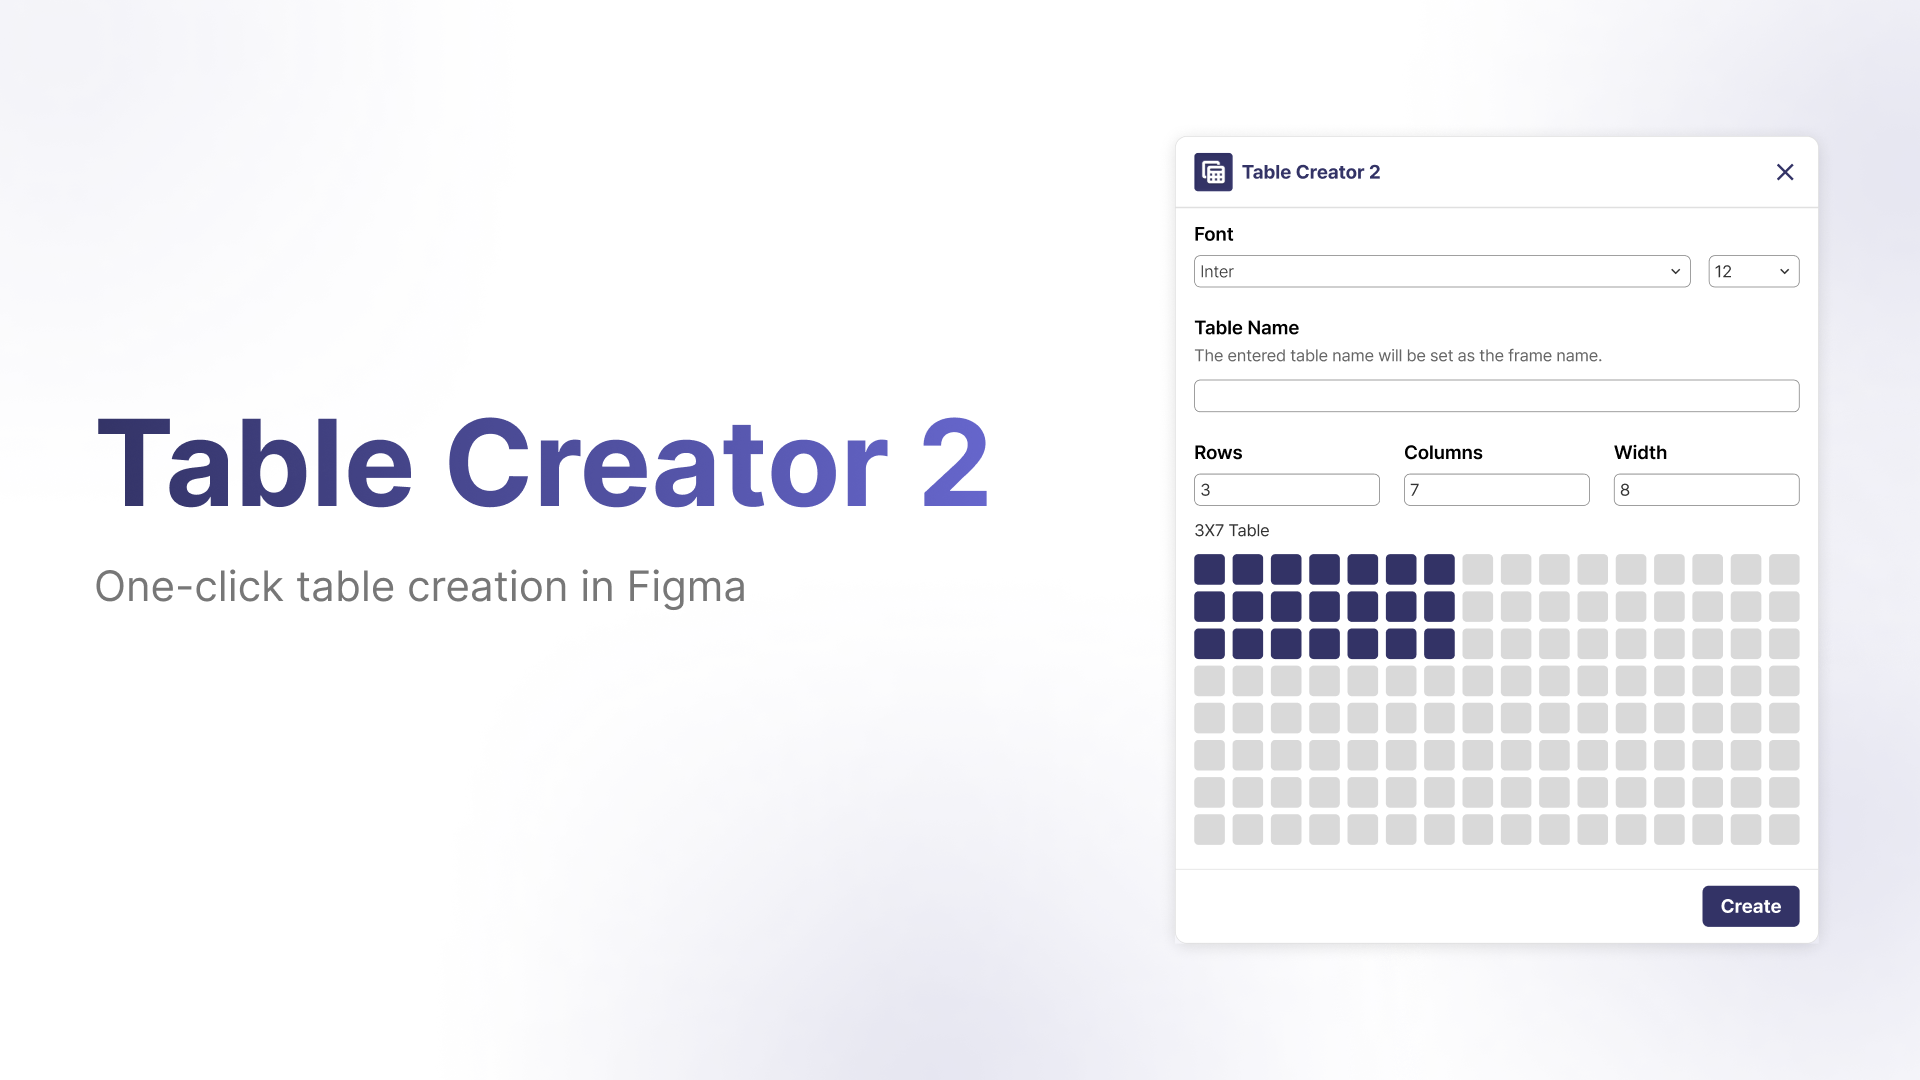
Table Creator 2 is a plugin that allows you to create tables in Figma quickly and effortlessly.
You can build intuitive tables by specifying rows, columns, cell width, and fonts.
Link: https://www.figma.com/ko-kr/community/plugin/1596099586184121366/table-creator-2
Key Features
- Create tables
- Adjust row and column width/height
- Add and delete rows and columns
How to Use
1. Subscribe to and Run the Table Creator 2 Plugin
- Click the Resources tool button located at the bottom center of Figma.

- Go to the Plugins tab.
- Enter "Table Creator 2" in the search field.
- Select Table Creator 2 from the results and run it.
Table Creator 2 offers a 7-day free trial.
Please start the free trial first, then run the plugin and follow the instructions to begin.
2. Creating a Table
- Run the Table Creator 2 plugin.
- Click the [Create Table] button.
- When the plugin opens, select the font and font size.
- Enter the table name.
- The entered name will be used as the Component name of the table.
- Set the table size.
- Method A) Enter numbers in Rows / Columns.
- Rows = number of table rows
- Columns = number of table columns
- Method B) Select the desired size from the cell grid.
- The selected grid value is automatically reflected in Rows / Columns.
- Method A) Enter numbers in Rows / Columns.
- Enter the cell width.
- Cell width = width of each individual cell in the table
- Click the [Create Table] button.
3. Adjusting Row and Column Width/Height
Open Row/Column Size Adjustment
- Select the created table.
- Click the [ · ] button next to the selected row or column.
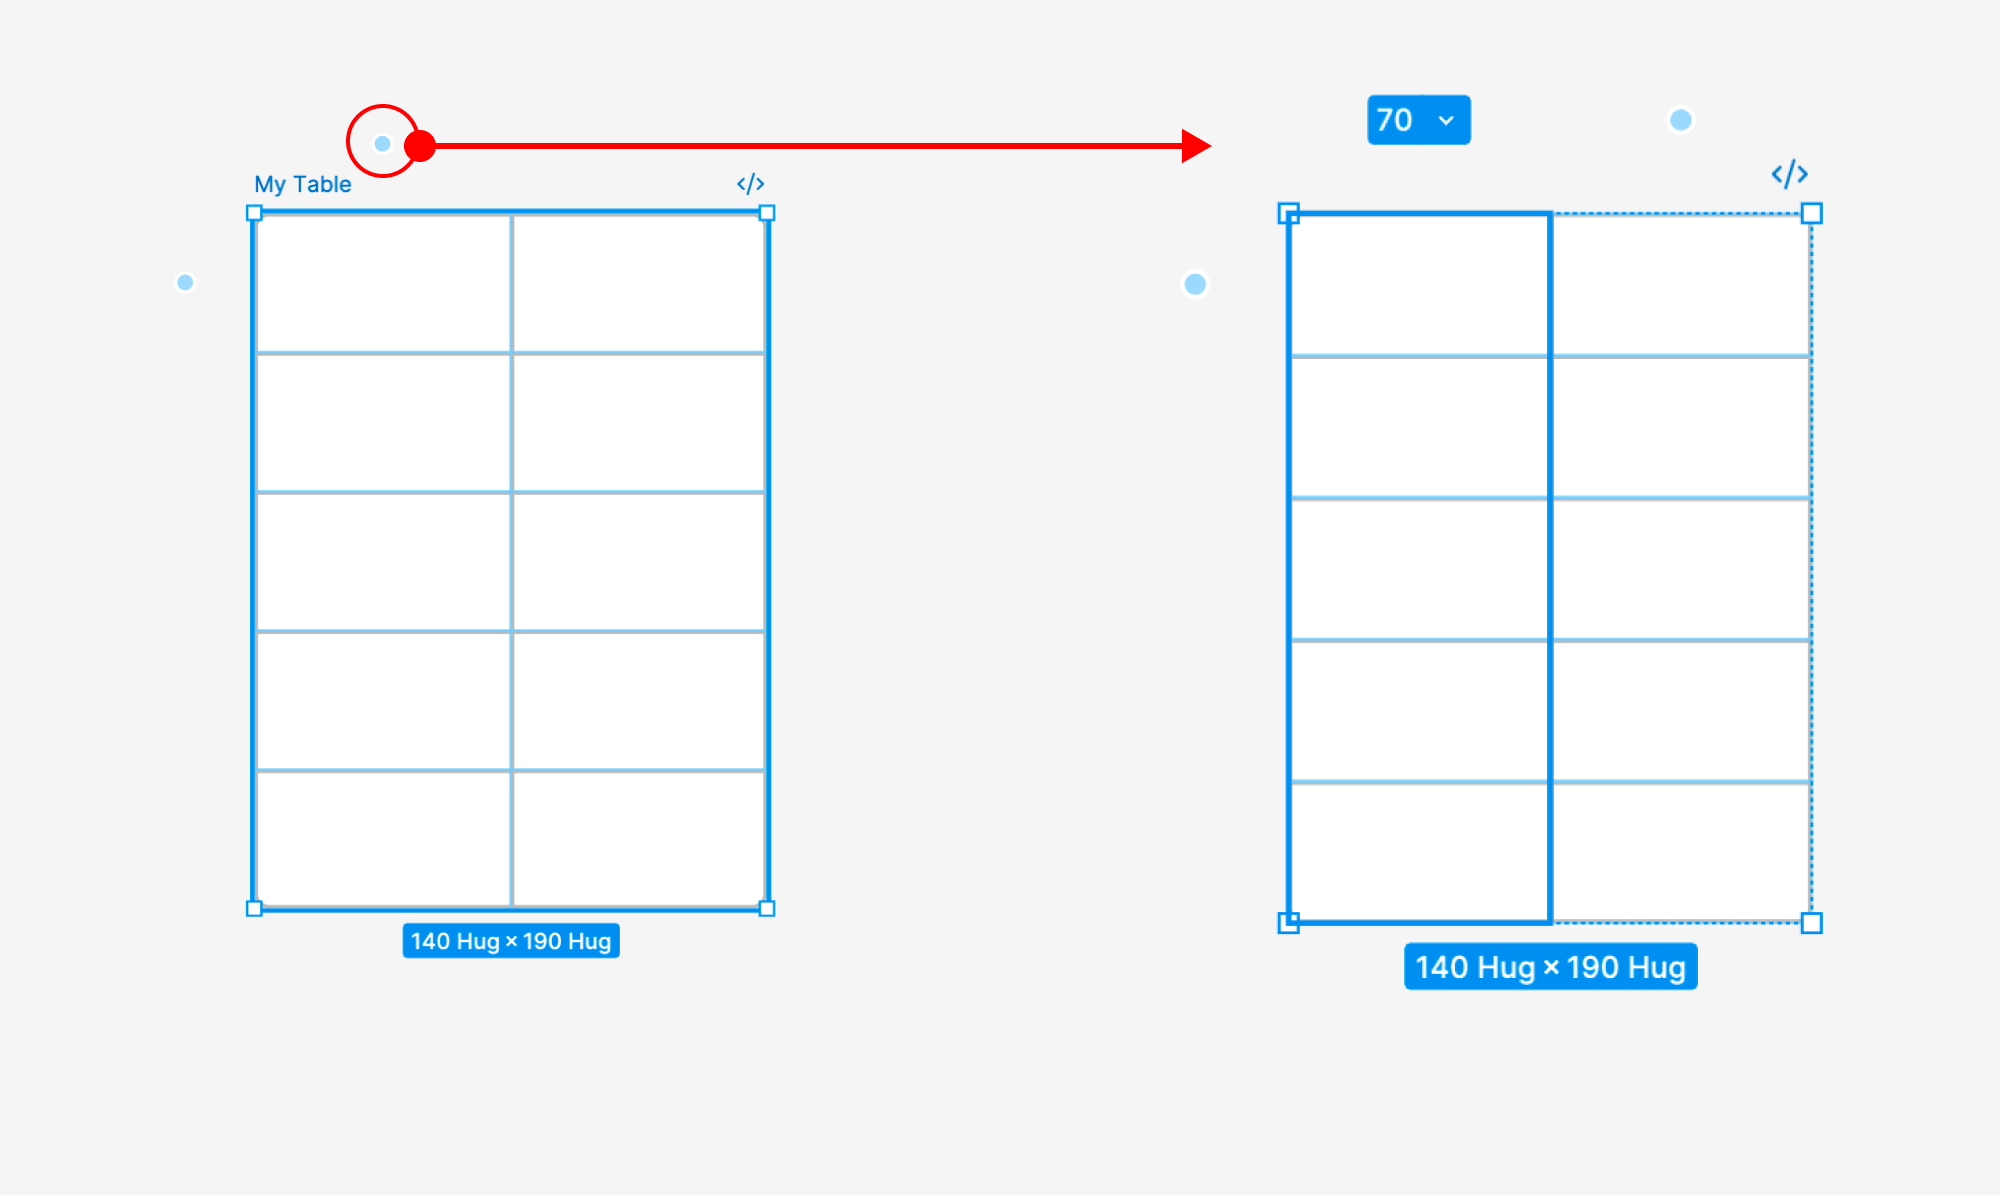
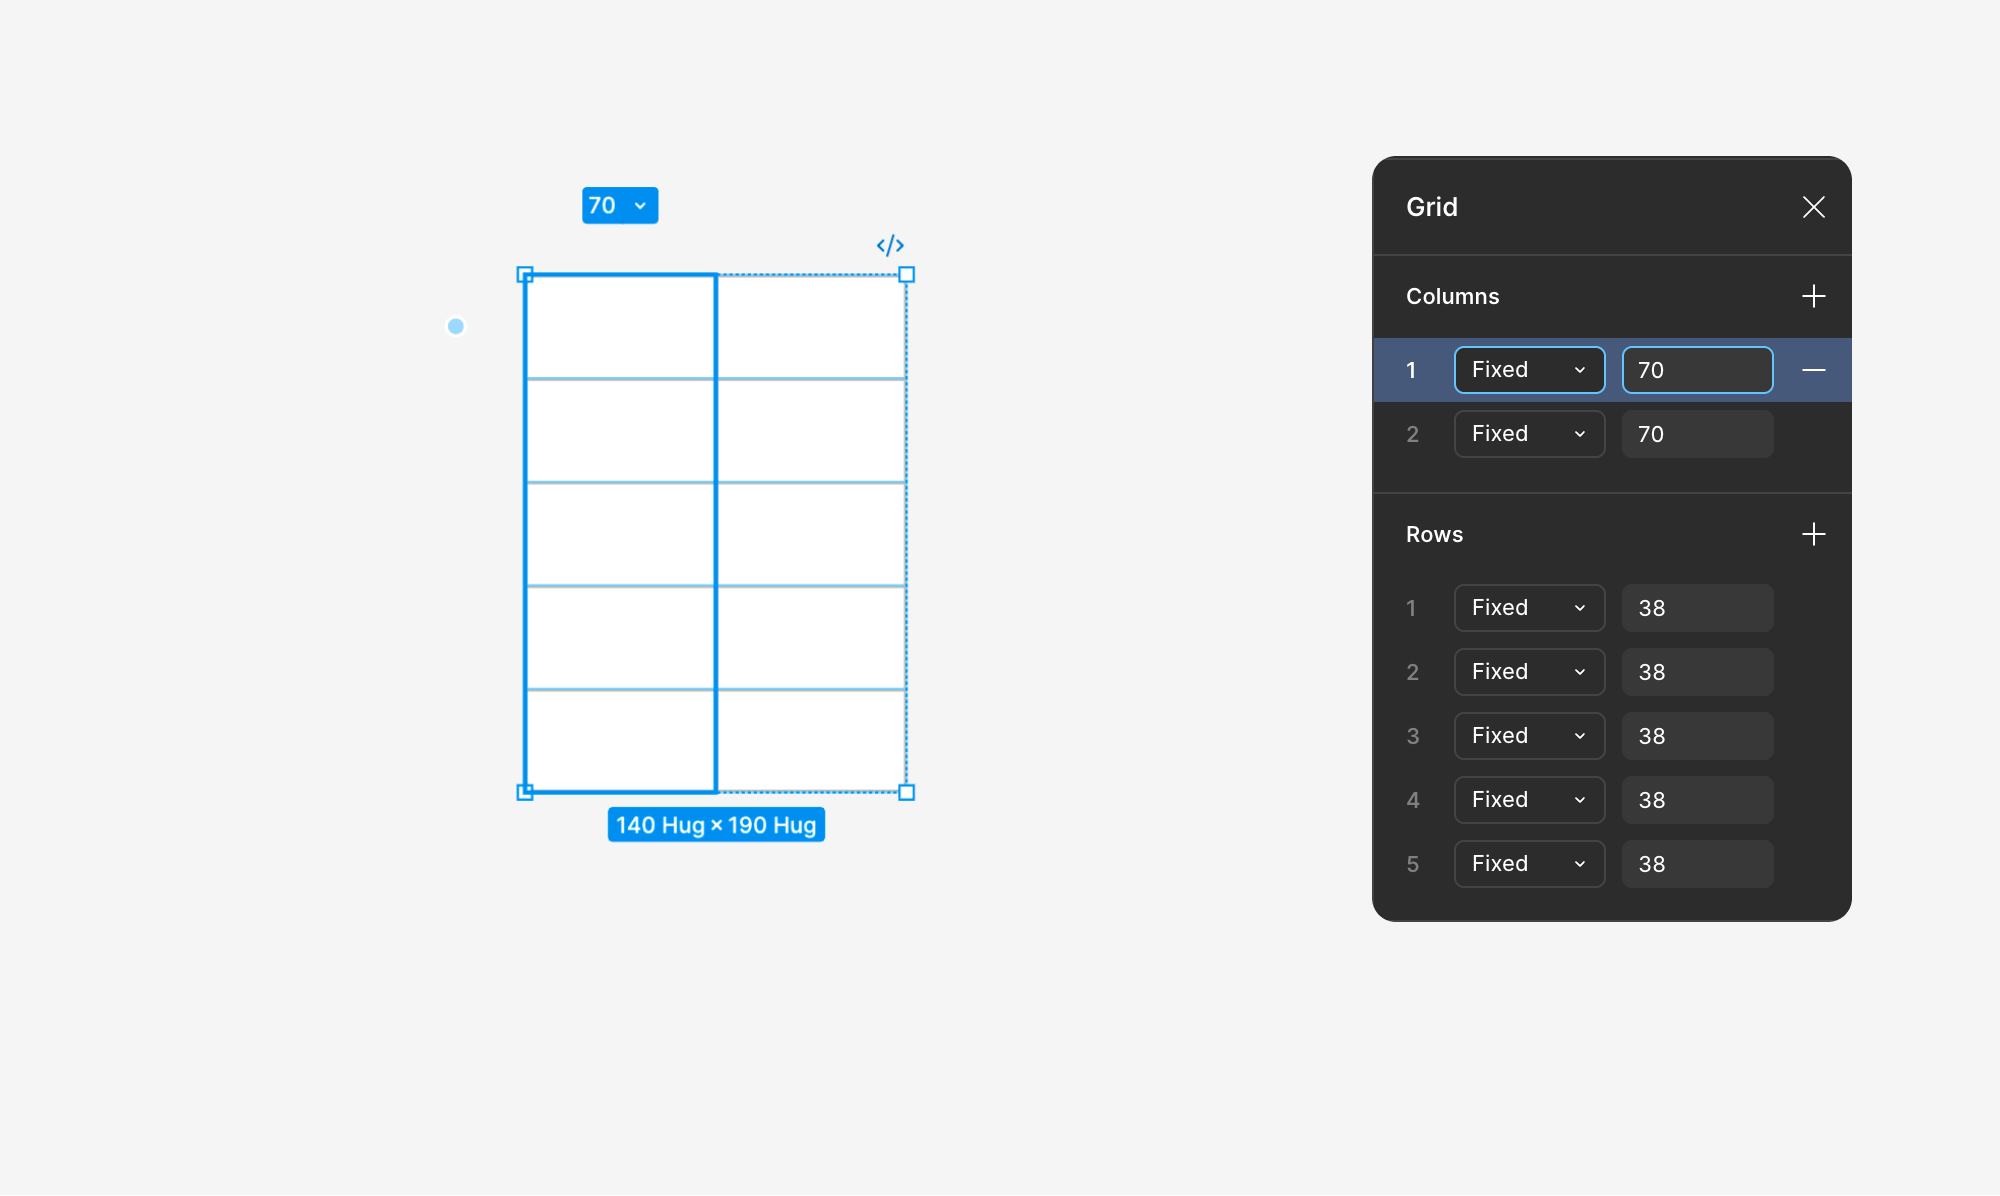
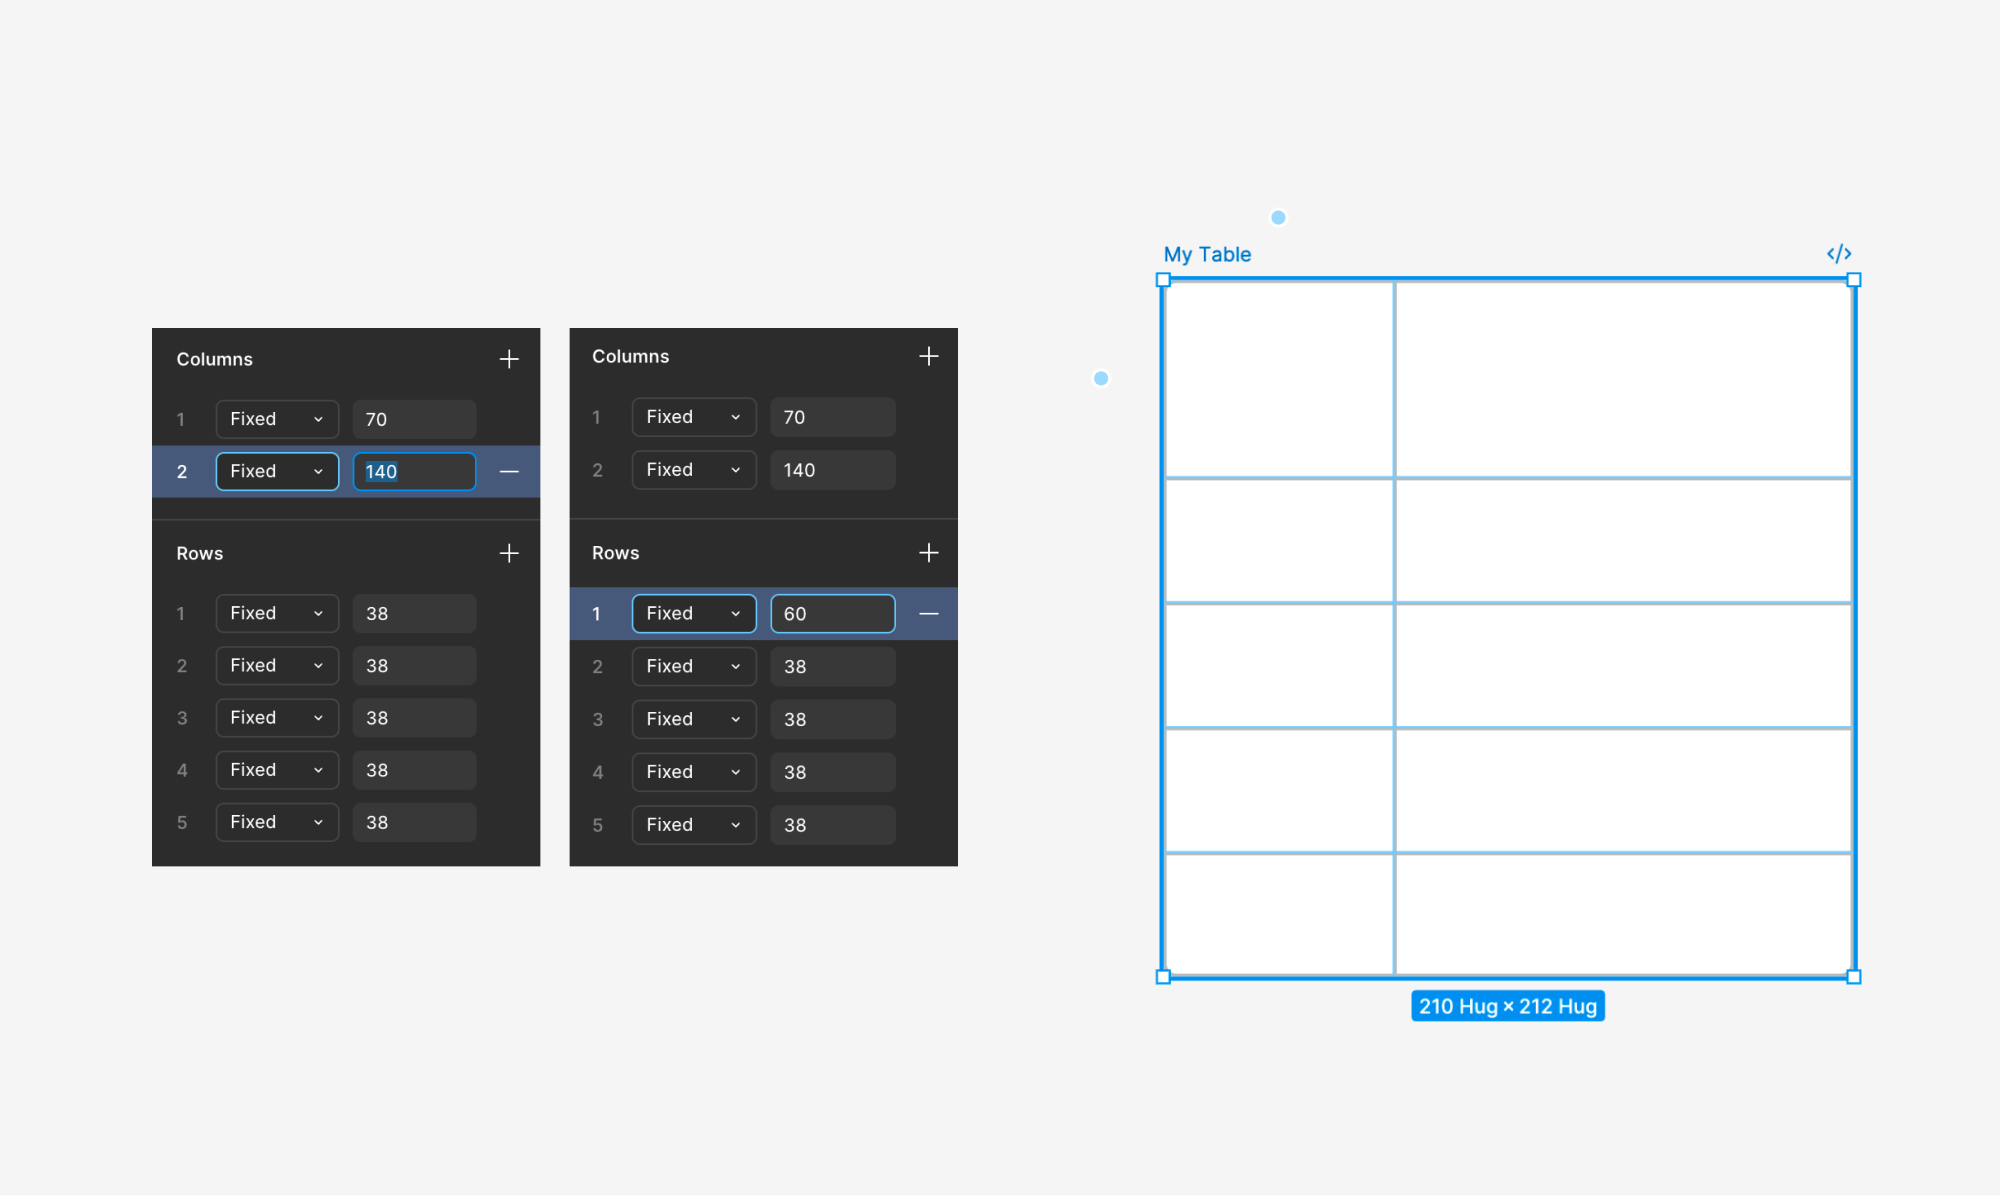
Adjust Row/Column Size
- After clicking the [ · ] button next to a row or column, the Figma grid-based adjustment UI appears in the right panel.
- Use the Columns input field to adjust row widths.
- Rows are displayed in order: 1 → 2 → … → N.
- Use the Rows input field to adjust column heights.
- Columns are displayed in order: 1 → 2 → … → N.
- The entered values are applied in real time to the corresponding row/column width and height.
4. Adding Rows and Columns
Add Rows
- Select the cell that will serve as the reference point.
- Run the Table Creator 2 plugin.
- Click the [Add Row] button.
- Choose the insertion position based on the selected cell's row.
- [Above]: Adds a row above the selected cell.
- [Below]: Adds a row below the selected cell.
- Choose the number of rows to add.
- You can add 1 to 5 rows at a time.

Add Columns
- Select the cell that will serve as the reference point.
- Run the Table Creator 2 plugin.
- Click the [Add Column] button.
- Choose the insertion position based on the selected cell's column.
- [Left]: Adds a column to the left of the selected cell.
- [Right]: Adds a column to the right of the selected cell.
- Choose the number of columns to add.
- You can add 1 to 5 columns at a time.

5. Deleting Rows and Columns
Delete Rows
- Select the cell that will serve as the reference point.
- Run the Table Creator 2 plugin.
- Click the [Delete Row] button.
- The entire row of the selected cell will be deleted.

Delete Columns
- Select the cell that will serve as the reference point.
- Run the Table Creator 2 plugin.
- Click the [Delete Column] button.
- The entire column of the selected cell will be deleted.
Continuous Updates
Table Creator 2 is continuously improved to provide a more stable and convenient experience.
In addition to bug fixes and performance improvements, new features are regularly added.
If you encounter any issues or have feature suggestions, please feel free to share your feedback. We will review and reflect it promptly.
Contact: [email protected]